PrestaShop is yet another e-commerce platform with the necessary tools to build and manage an online store.
Installing ShoppingFeeder Plugin on PrestaShop
- Download the ShoppingFeeder add-on from the PrestaShop Addons Marketplace
- Log in to your PrestaShop admin site
- Click Modules and Services -> Modules and Services.
- Click Add new module.
- Browse to the ShoppingFeeder add-on zip file you downloaded in Step 1.
- Click Upload this module and wait for the upload to complete.
- Search for the ShoppingFeeder Module in Module and Services
- Click Install
- Configure ShoppingFeeder API Key and API Secret that you would have received in setup.
Connecting ShoppingFeeder to Your PrestaShop Store
- Create a ShoppingFeeder Account
- Log in to ShoppingFeeder and begin setup wizard
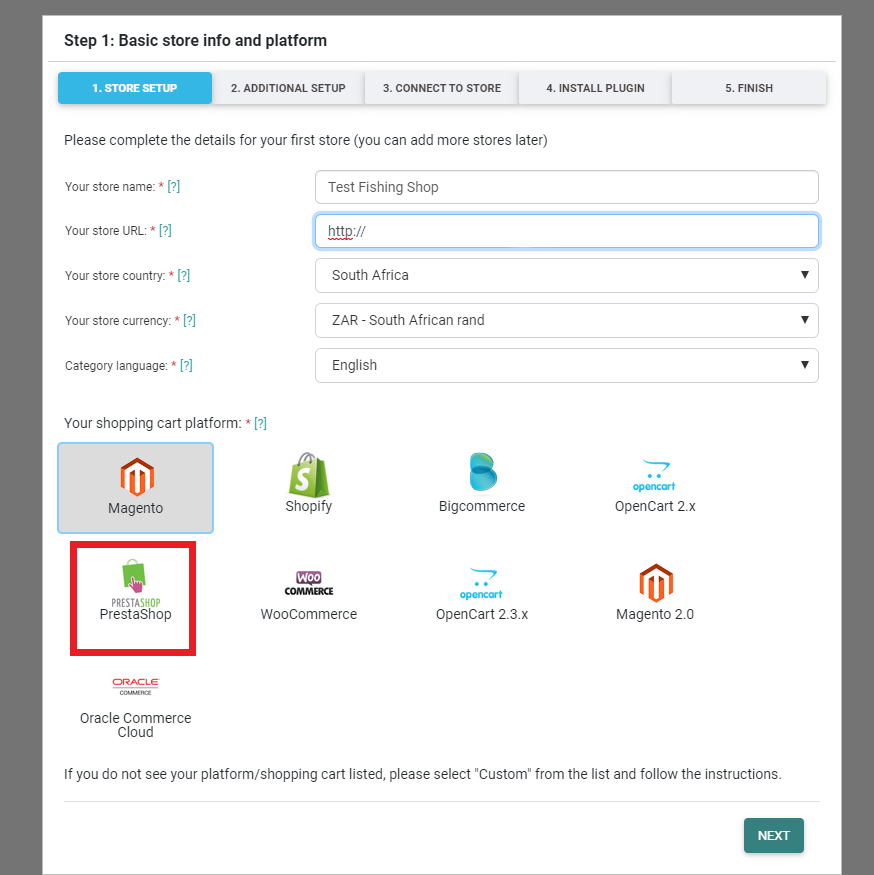
Step 1: Enter your store’s URL. Set the primary currency and language of your store and select PrestaShop as your platform
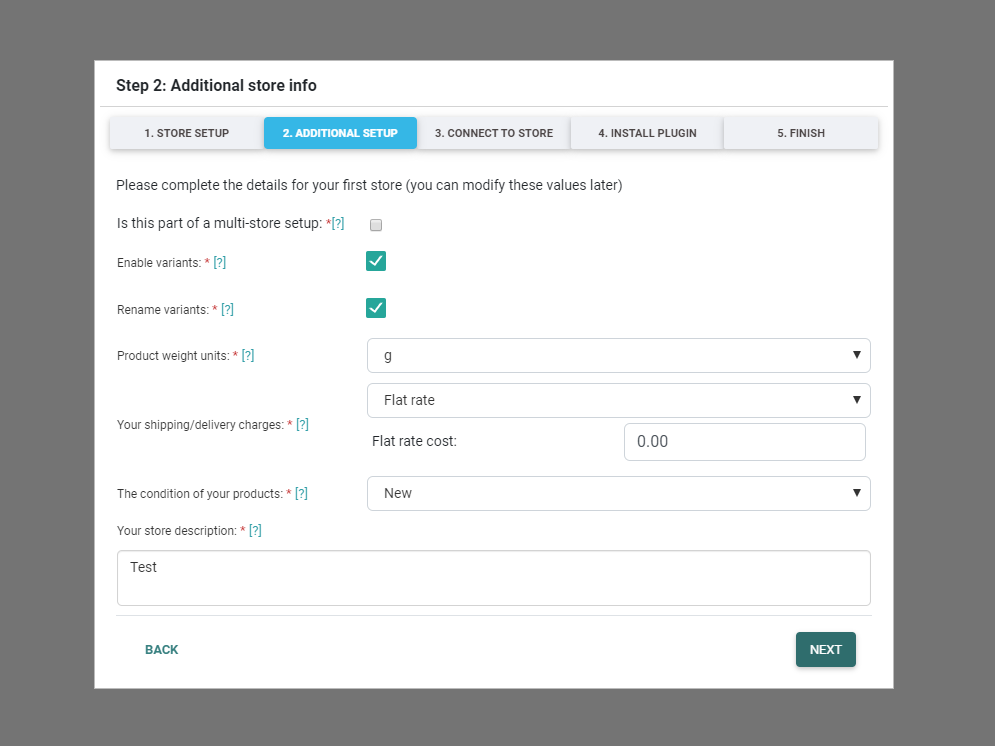
- Step 2: Complete the details under Additional Info.
- Enable variants creates separate offers for each product in your store that has variant. Example: If a Shirt is available in Red and Blue, ShoppingFeeder will create a Red Shirt offer and a Blue Shirt Offer
- Rename variants: By default ShoppingFeeder will append the variants onto the title of your products. This allows for the creation of unique product title. You can disable this by untick the check box.
- Step 3: Setup the connection to your Store
- Copy and Paste the API Key and API Secret into the respective fields in the ShoppingFeeder Module in PrestaShop
- Step 4: Test that your plugin is installed correctly.
- Step 5: Set your Store’s localization options