Once you’ve registered and created a ShoppingFeeder account, you’ll be guided through a step-by-step wizard to get your store connected to ShoppingFeeder.
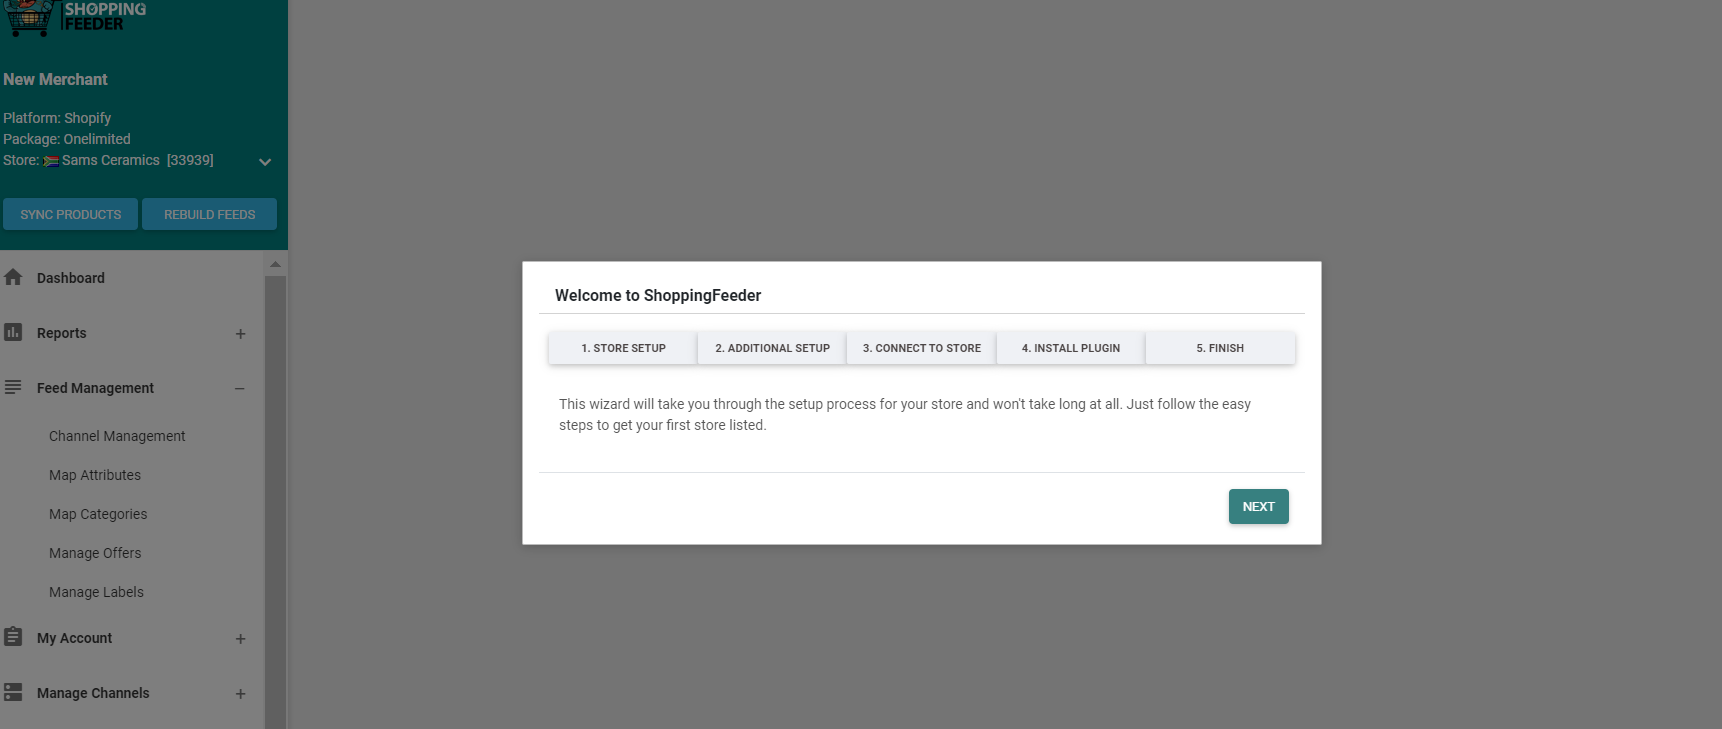
Once you’ve signed into your ShoppingFeeder account for the first time, you’ll be presented with the setup wizard. Click Next to continue.
Be sure to type a valid URL e.g. ‘https://tshirtshop.com’ and select the appropriate shopping cart platform e.g. Shopify.
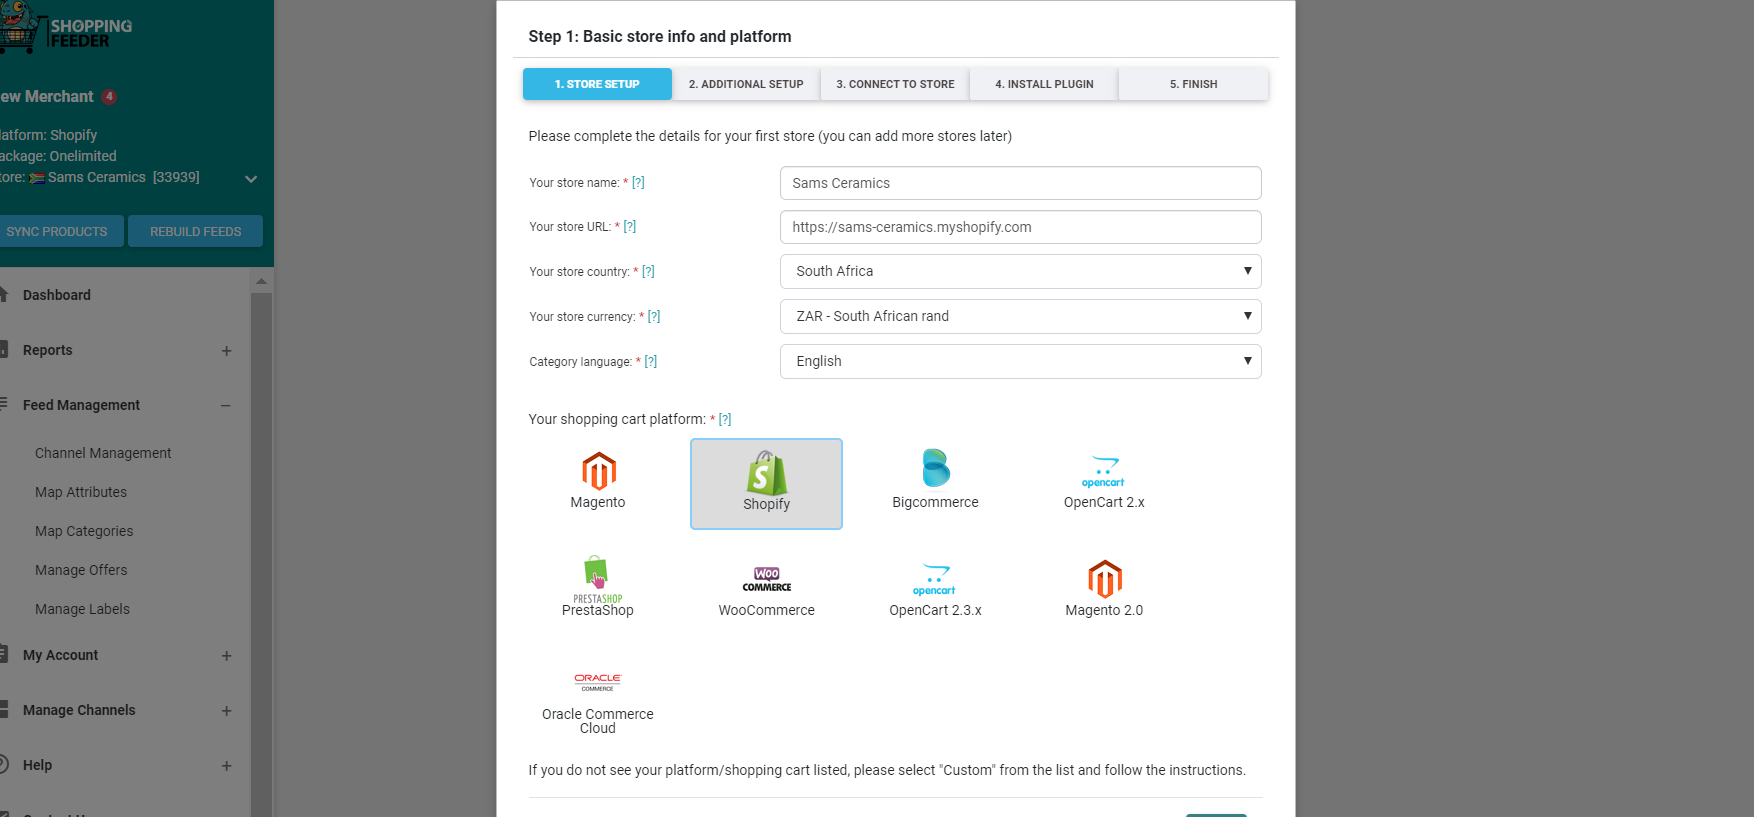
This screen may vary depending on the e-commerce platform you are integrating with ShoppingFeeder. However, the following information is standard irrespective of e-commerce platform.
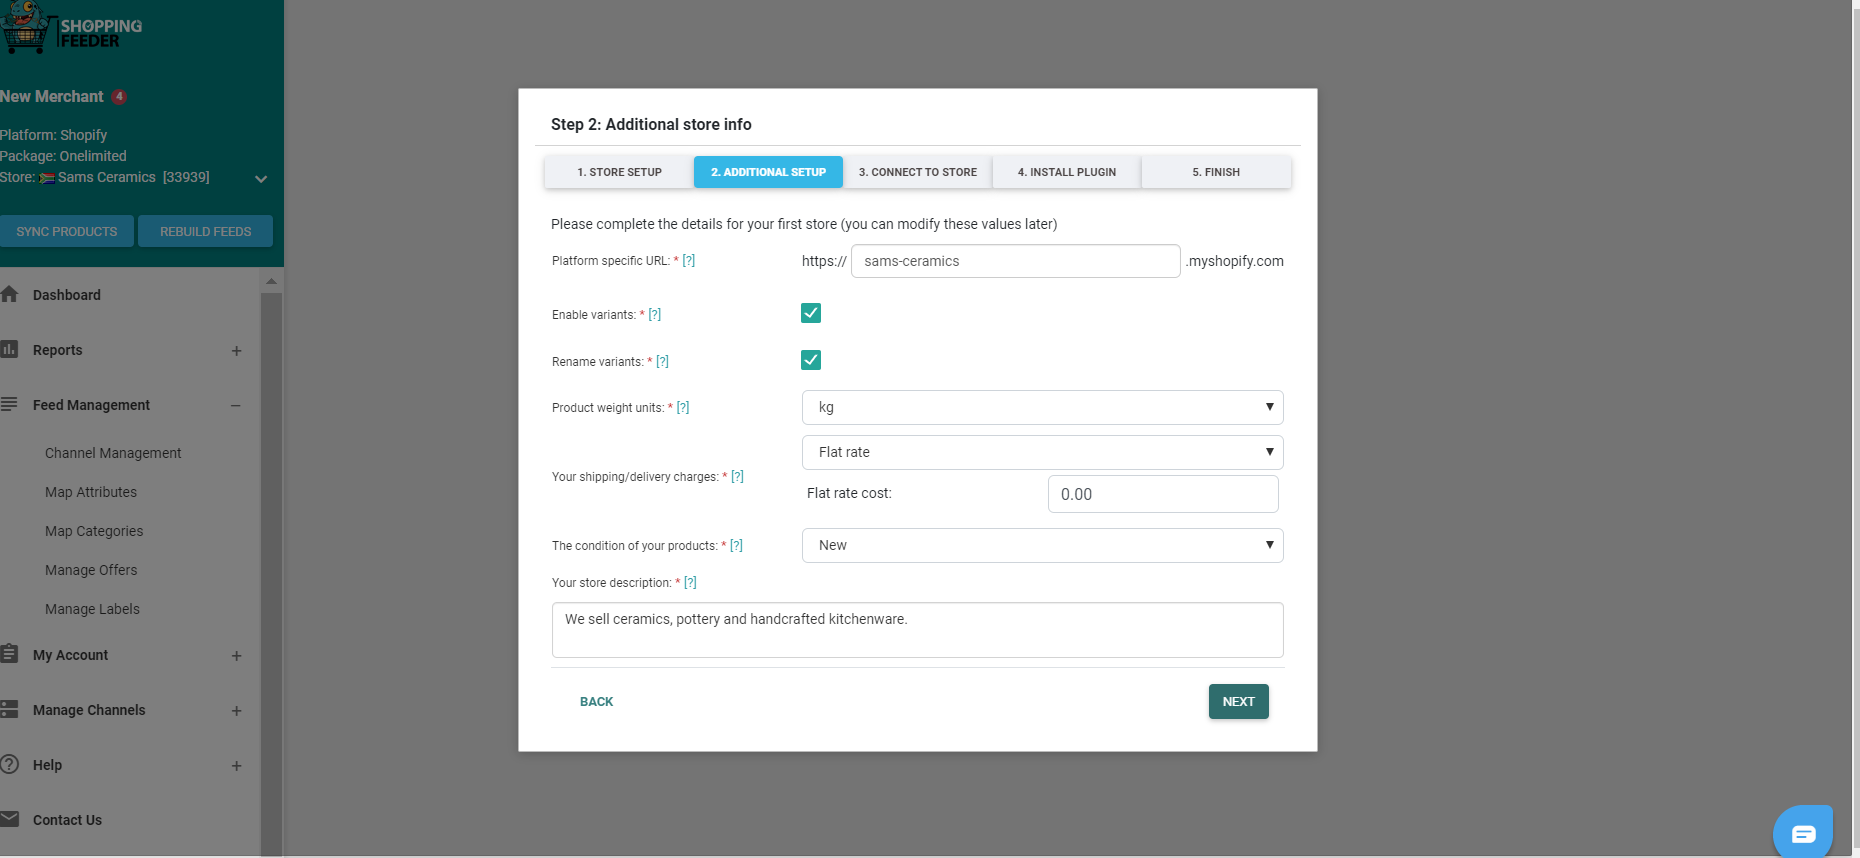
- Enable Variants: This field creates separate offers for each variance in your inventory. If you have a shirt that is available in three different colours and Enable Variants is turned on, ShoppingFeeder will create three unique offers.
- Rename Variants: By turning this on, ShoppingFeeder will append the variant name to the end of the product title e.g. Evening Dress / Red / Size 32.
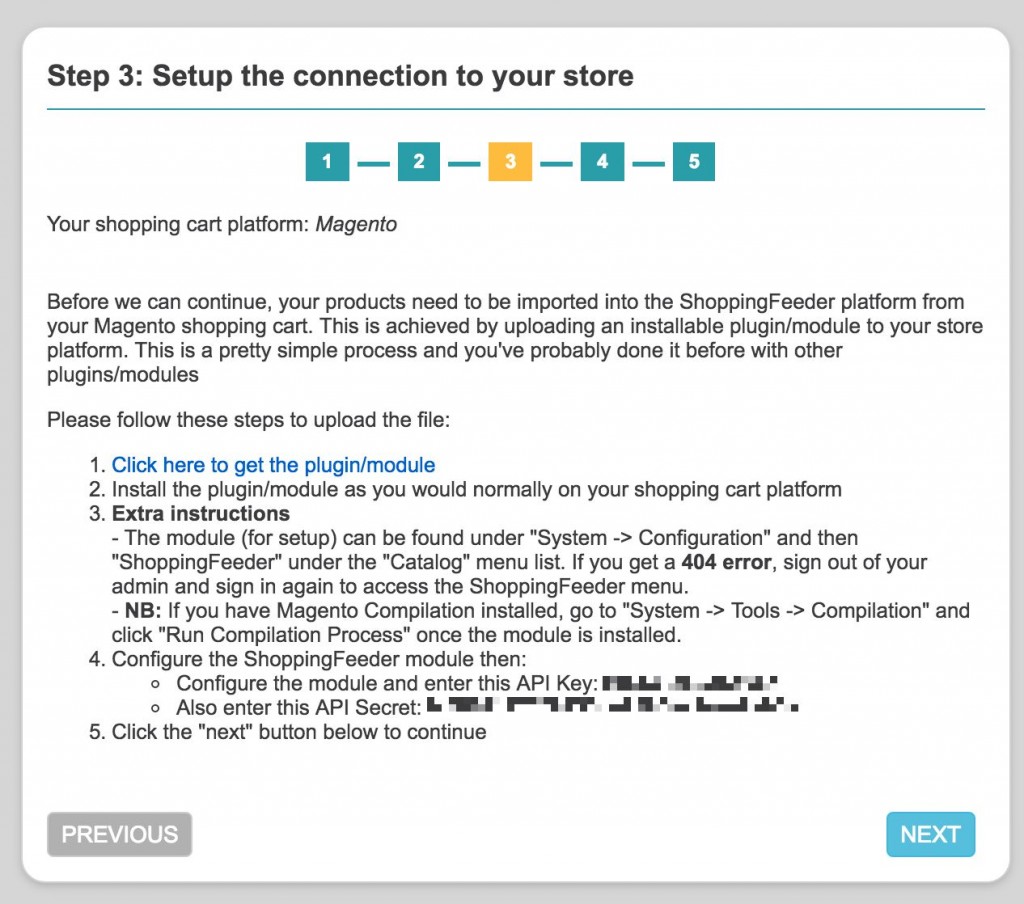
Via API Keys:
If you are connecting ShoppingFeeder to a Magento, Prestashop, OpenCart or WooCommerce store, you will be required to enter API Keys. Simply copy and paste the API Key and API Secret into the ShoppingFeeder Plugin.
Via OAuth:
If you are connecting ShoppingFeeder to Shopify, this will happen via OAuth and does not require API keys.
Click Click here to install the app.

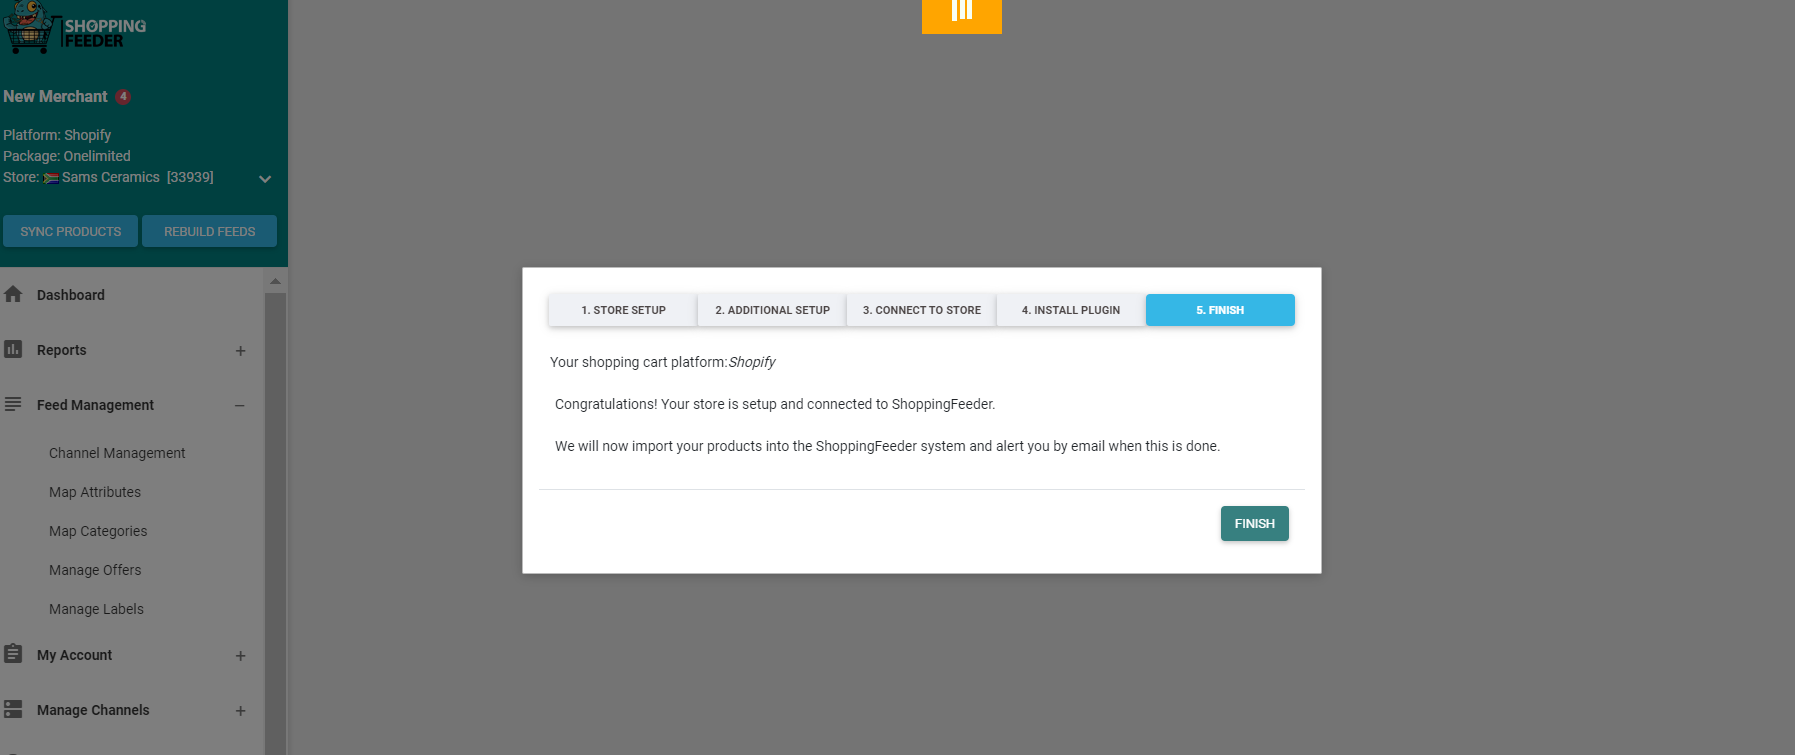
You’ve now successfully connected ShoppingFeeder to your e-commerce store.
Click Finish to begin importing products.
The next step is to subscribe to a channel so you can start driving traffic to your e-commerce store.